
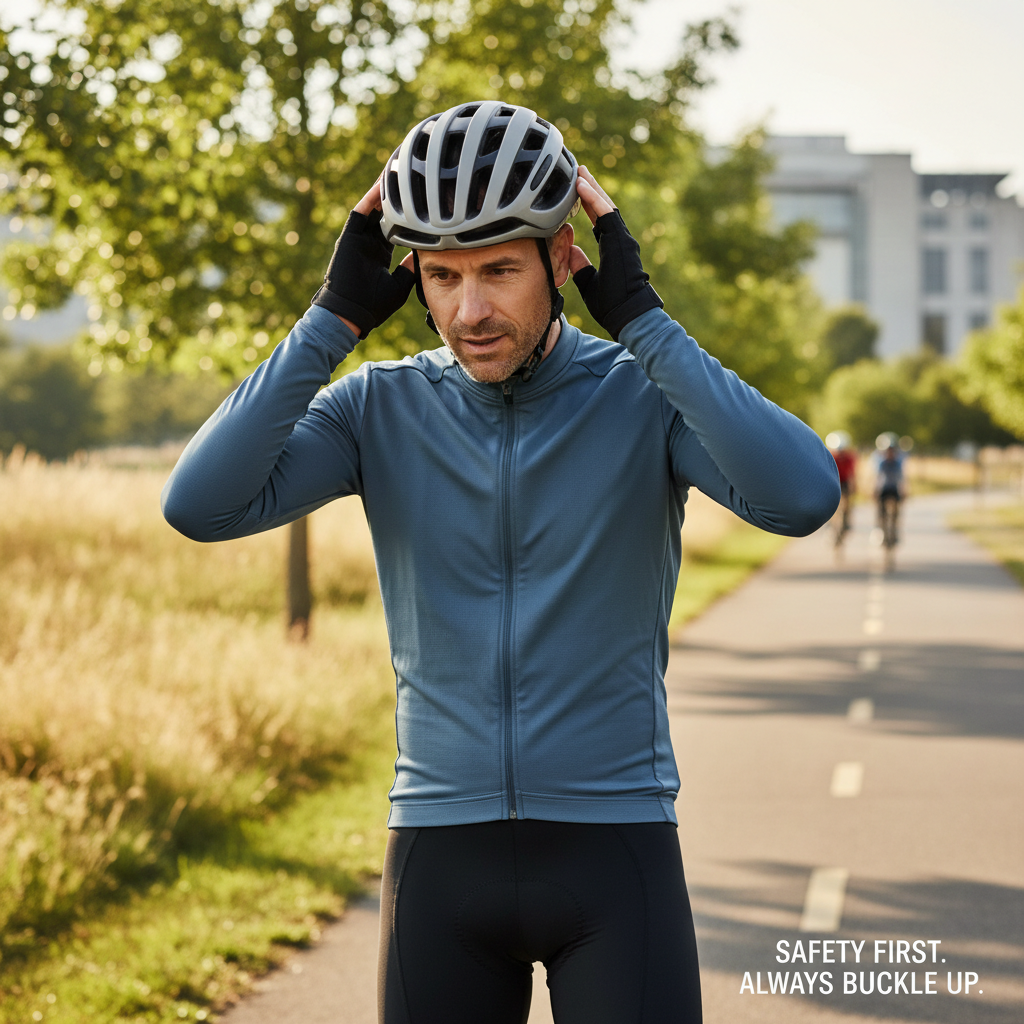
How to adjust a bike helmet properly comes down to three things: where the helmet sits, how the straps form a “V” under your ears, and how snug the retention dial feels without creating pressure points.
If your helmet shifts when you look down, tilts back and exposes your forehead, or leaves you with a headache after 15 minutes, that’s not just annoying, it’s a safety issue. A helmet can only do its job when it stays in the right place through bumps, turns, and sudden stops.

The good news is most fit problems are fixable in five minutes, without buying anything new. Below is a practical setup you can follow, plus quick checks to confirm you’re in the safe, comfortable zone.
Start with the right helmet size (before you touch the straps)
Adjustment can’t compensate for the wrong shell size. If the helmet is too big, you’ll keep chasing wobble. Too small, you’ll overtighten everything and still feel hot spots.
- Measure your head with a soft tape around the largest part, usually about 1 inch above eyebrows and around the back bump of your skull.
- Match the brand’s size chart. S/M/L ranges vary a lot between manufacturers.
- Try the “no-hands” test: set the helmet on your head with straps unbuckled. It should feel stable and not drop over your eyebrows.
According to the Consumer Product Safety Commission (CPSC), bicycle helmets sold in the U.S. must meet specific impact requirements, but that standard doesn’t guarantee fit on your head shape. Fit is still on you.
Get the helmet position right: level, low, and centered
The most common mistake is wearing the helmet too far back. That leaves your forehead exposed and makes the straps feel “wrong” no matter what you do next.
- Level: the front rim should be parallel to the ground, not tipped up like a cap.
- Low: aim for about two finger-widths above your eyebrows.
- Centered: equal coverage left/right, and the helmet doesn’t drift when you turn your head.
If you can see a lot of forehead in the mirror, or the helmet touches the top of your sunglasses before you even tighten anything, adjust the internal cradle or move pads before you touch strap length.
Dial in the retention system (the “fit ring”) without over-tightening
The retention dial or inner fit ring is what keeps the helmet from rocking. It should feel snug around the back and sides of your head, but not like a vise.
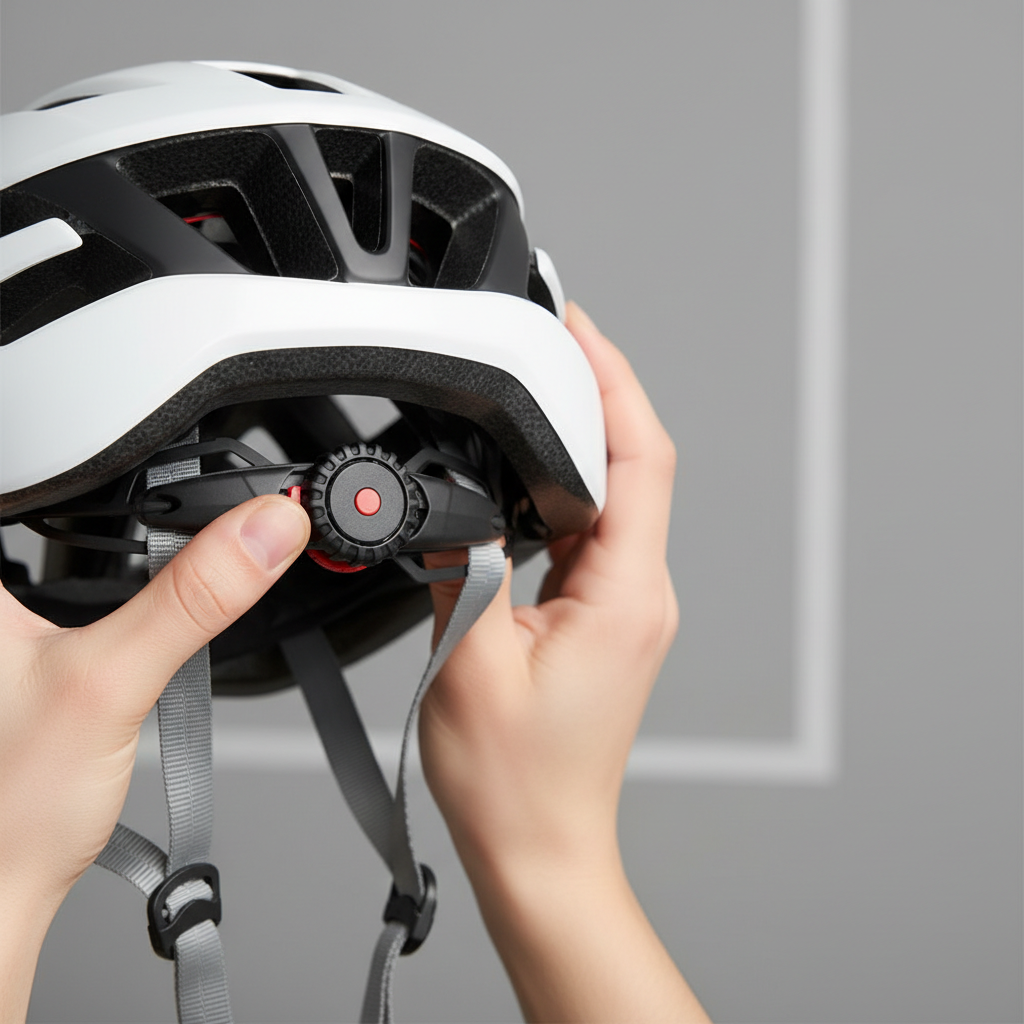
- With the helmet level, tighten the dial until the helmet stops sliding when you gently push it side-to-side.
- Open your mouth wide: you should feel slight pressure at the top/front, but it shouldn’t hurt.
- If you get pressure points, back off a click and adjust pads instead of cranking tighter.
Some helmets let you move the fit ring up/down at the back. Many riders feel more stability when the ring sits slightly lower on the occipital area (the back “bump”), but comfort varies by head shape.
Adjust the side straps: make a clean “V” under each ear
Side straps do two jobs: keep the helmet from tipping forward/back, and keep it centered. When they’re right, you barely think about them.
Quick setup
- Find the Y-splitter (the little plastic piece where straps split). Slide it so it sits just below your ear.
- Check the “V”: straps should form a neat V shape around the ear, not press into it.
- Make both sides symmetrical enough that the helmet stays centered.
If one side feels tight and the other loose, don’t fix it by moving the helmet off-center. Fix it by evening strap length through the splitter or buckle hardware.
Set the chin strap tension: snug, but you can still breathe and talk
Chin strap problems usually show up as either “flappy straps” (helmet can roll) or “choked out” (you avoid buckling it at all). The sweet spot is simple.
- Buckle it, then tighten until only one or two fingers fit between strap and chin.
- Keep the buckle centered under your chin, not on your throat.
- If the strap rubs, try moving the strap pads or changing the strap angle slightly at the splitter.
According to the National Highway Traffic Safety Administration (NHTSA), correct helmet use matters for protection, and a secure strap is a core part of that. If you can pull the helmet off without unbuckling, it’s not secure enough.
Do these 60-second safety checks before you ride
This is the part most people skip, then wonder why the helmet feels “fine” in the house and weird on the road. Use these quick checks any time you change pads, wash straps, or lend your helmet to someone.
- Shake test: with straps buckled, shake your head “no” and “yes.” Helmet should move minimally and not slide over eyebrows.
- Roll-off test: place your hands on the front rim and push up and back. It should resist rolling off.
- Vision check: you can look up without the front rim blocking your view.
- Comfort check: no sharp pressure points after 5 minutes of wear.
If any check fails, go back in order: position, dial, side straps, then chin strap. Fixing chin tension first often hides a bigger fit issue.
Common fit issues and fast fixes (use this table)
Most adjustments are pattern-matching: you feel a symptom, and the fix is usually one or two changes.
| What you notice | Likely cause | What to try |
|---|---|---|
| Helmet tilts back, lots of forehead showing | Helmet sitting too high or too far back | Level it, move it forward; adjust fit ring position if possible |
| Helmet rocks side-to-side | Retention dial too loose, wrong size, or pads too thin | Tighten dial one click at a time; swap thicker pads; consider different size |
| Straps rub ears | Y-splitter too high/low | Slide splitter so the “V” sits just under the ear |
| Chin strap feels like it’s on your throat | Buckle position off, strap routing uneven | Center buckle under chin; equalize strap length on both sides |
| Headache or “hot spot” after a short ride | Over-tightened dial or pressure from pad edges | Back off dial; reposition pads; try a different helmet shape |
| Helmet shifts when you open your mouth | Chin strap too loose | Tighten until 1–2 fingers fit; re-check roll-off test |
Practical tips for different riding setups (commute, road, MTB, kids)
Fit rules stay the same, but a few details change in real life.
- Commuting with a cap or beanie: adjust fit while wearing the layer you actually ride in, but avoid thick hats that prevent the helmet from sitting low and level.
- Road riding with sunglasses: put glasses on during the fit check, if the helmet pushes frames down, reposition helmet and pads before tightening straps.
- Mountain biking: more movement and vibration usually means you want the retention system slightly snugger, but still comfortable.
- Kids: adults should do the final checks. If a child can pull the helmet off without unbuckling, it needs re-fitting.
Also worth saying plainly: after any crash where your head hits, many manufacturers recommend replacing the helmet, even if damage isn’t obvious. If you’re unsure, check the brand guidance or ask a bike shop.
When to get help from a bike shop or a professional
If you’ve followed the steps and the helmet still won’t stay put, the issue is often helmet shape mismatch, not your technique. Some heads are rounder, some more oval, and brands vary.
- You feel stable only when the dial is painfully tight.
- The helmet looks level, but always slides forward or backward on bumps.
- You have persistent jaw pain, headaches, or skin irritation from strap contact.
A reputable shop can usually fit you in minutes, swap pads, and suggest a shell shape that matches your head. If you have a medical condition affecting your head/neck/jaw, it may be smart to consult a healthcare professional for personalized guidance.
Key takeaways (bookmark this)
- Position first: level and low, about two fingers above eyebrows.
- Dial second: snug enough to stop wobble, not tight enough to cause pain.
- Straps third: a clean “V” under each ear, buckle centered.
- Confirm with tests: shake test and roll-off test before riding.
Conclusion: a good fit feels boring, and that’s the point
Once you learn how to adjust a bike helmet properly, you stop thinking about it mid-ride, and that’s usually the best sign you nailed it. Take five minutes to set position, dial, straps, then run the quick tests, and re-check anytime you change pads or layers.
If you want an easy next step, do the roll-off test right now, then make one small adjustment at a time until the helmet stays level and calm on your head.
FAQ
How tight should a bike helmet feel?
Snug enough that it doesn’t rock when you move your head, but not so tight it creates pain or a headache. If you need painful pressure to keep it stable, the helmet size or shape may be wrong.
Where should a bike helmet sit on your forehead?
Usually about two finger-widths above your eyebrows, with the helmet level. If it sits higher or tilts back, your forehead coverage drops and straps become harder to set.
Why does my helmet slide forward when I ride?
Common causes include a loose retention system, straps that don’t form a proper “V” under the ears, or a helmet that’s slightly too large. Start by re-leveling the helmet, then tighten the dial one click at a time.
Should the chin strap touch my throat?
Ideally no. The buckle should sit under your chin, and the strap should feel secure without pressing into your throat when you swallow or talk. Adjust strap routing and buckle centering.
Can I wear a hat under my bike helmet?
Sometimes, yes, but thick hats often prevent a low, level fit and can make the helmet less stable. If you ride in cold weather, a thin skull cap made for helmets tends to work better.
How do I know if my helmet is too big?
If it shifts easily even with the dial tightened, or you can pull it off without unbuckling, it’s likely too big. Another clue is needing extreme strap tension just to keep it in place.
Do I need to replace my helmet after a crash?
Many manufacturers recommend replacing after a head impact, because internal foam can be compromised without obvious cracks. If you’re uncertain, check the brand’s guidance or ask a bike shop to inspect it.
If you’re still fighting wobble, pressure points, or strap rub after trying these steps, you may save time by having a local bike shop do a quick fit check and recommend a helmet shape that matches your head and riding style.